For car owners blessed with patience and a few manual skills, fixing dents can be a great way to save money. Just don't expect to win every battle.
If your car is like the full moon—pretty, but with a lot of craters—then you'll be happy to learn that there are as many ways to fix those pockmarks as there are ways to get dinged in the first place. The car world teems with home handymen who have come up with clever techniques to deal with various types of body damage. Not every technique works for every dent, but what have you got to lose?
1. Assess the damage
First, determine what is even feasible. The easiest blemishes to repair are basic indentations in smooth areas on steel body panels. If the dent has creased the metal, it’s going to be very difficult for an amateur to fix it right. Likewise if the dents are found at the edge of panels.
If the dents span ridges or valleys of the original body shape, then it’s almost certain that the entire fender will need replacement—a job that should not be undertaken by anyone but a professional body shop.
2. Try the tricks first
Some home mechanics claim near-miraculous results using the following technique, best employed when you have a straightforward dent that already looks like it wants to pop back into place. Using a hair dryer set to medium power, heat the dent well for several minutes, being careful not to apply so much heat that the paint finish is marred. Then tape a patch of aluminum foil over the dent. Using rubber gloves, take a small bag of dry ice and massage it over the foil. Listen for a pop—the sound of a sudden contraction of the metal that returns it to its original shape. Sometimes it works, sometimes it doesn’t.
3. Don’t ignore body filler
Snobs may look dimly upon it, but every body shop in the world at some point fills dents with a two-part, epoxy-style body filler. For small dents such as from hailstones, the technique does work. First, sand the dent all the way to the metal. Paint with primer.
Once dry, combine the hardener with the filler according to the package instructions and spread over the dent. Let dry for a half hour and sand off the rough parts. It may take a couple applications of body filler to properly fill the dent.
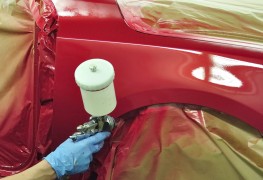
4. Finishing is the hardest part
To get a showroom-smooth surface on your repair, you need to immerse yourself in the tools of the body shop: various grades of sandpaper, electric buffers and grinders, and the combination of the right primer, paint shade, and clear topcoat. If you lack the patience for such a meticulous approach, you’re likely better off leaving it to the professionals.