Each year, hundreds of people suffer burns, scalds and other injuries when tap or shower water is excessively hot. In contrast, deadly legionella bacteria can grow in water heaters where the temperature is set too low to kill the organisms. A thermostatic mixing valve can help with both these issues. [Photo Credit: istock.com/DenBoma]
How to install a thermostatic mixing valve
Time: 1 – 2 hours
Frequency: As necessary
Difficulty: Basic plumbing and soldering experience recommended
Tools: Adjustable wrench, hex wrench, screwdriver, solder, thermometer
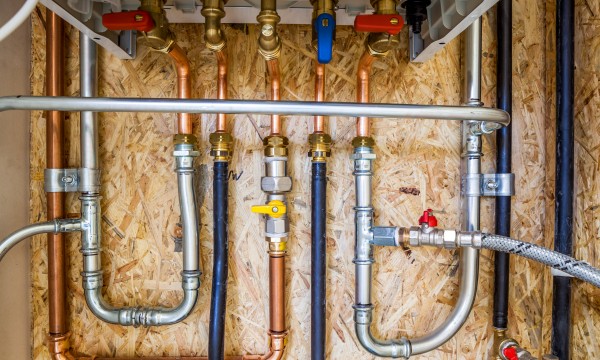
A thermostatic mixer can be installed in the hot water heater itself or on a specific plumbing fixture, such as through a shower valve. Here are four key steps to understanding and installing a thermostatic valve in a hot water heater.
Step 1: Understanding a thermostatic mixing valve
A thermostatic mixing valve blends hot and cold water to ensure constant, safe shower and tap water temperatures in order to prevent injuries. Scalding can occur with water that is too hot, but more commonly, injuries are due to “thermal shock,” such as a slip or fall when hotter than expected water flows from a showerhead, for example.
The thermostatic valve contains a mixing chamber that is set to regulate the inflow of hot and cold water to a preset temperature. Adjustments can be made to the maximum temperature depending on the brand and type of mixing valve being installed, but typically a temperature of 60˚C (140˚F) is recommended in Canada to kill the deadly bacteria linked to Legionnaires Disease.
Watch out!
Always check for the maximum outlet temperature recommended for the brand of the thermostatic valve being installed. When in doubt, consult a professional plumber.
Step 2: Preparing to install a mixing valve
While a professional installation is the best way to ensure the job is done safely and accurately, these steps describe the basic process for installing a mixing valve in a supply tank. A shower valve is also available where, for instance, a different temperature setting is desired for the shower than for other faucets or appliances.
Before beginning an installation, ensure you’re prepared for the job:
- Turn off the main water supply.
- Bleed the lines by opening all the faucets in your house. This empties the pipes of any remaining water.
- Select an installation location for the mixing valve that will be easy to access for cleaning, maintenance, or adjustment purposes.
Good to know!
Emptying the pipes of water will take a while, so be patient! Also, some appliances, such as a dishwasher, benefit from extra hot water. Consider running a separate line from the water heater directly to the appliance and bypassing the thermostatic valve.
Watch out!
Always check your local building and plumbing codes for any qualifications or specific procedures necessary to install a thermostatic mixing valve.
Step 3: Installing a thermostatic mixing valve
With the water turned off and a location for the installation chosen, you’re ready to attach the valve.
- Usually, the mixing valve can be installed in any position, but refer to the manufacturer’s instructions to make sure this is the case in the model you’ve chosen.
- Connect the water supply pipes. There will be a connection location for each of the hot and cold supply pipes and one for the mixed water outlet to the heater.
- Solder the connections to the valve prior to fixing the mixing valve in place to prevent damaging any gaskets. Your valve may be able to be threaded to the pipe, eliminating the need for soldering.
- Attach the mixing valve to its location and tighten with a wrench.
- Once the thermostatic valve is attached, open the cold water supply followed by the hot water supply and check for leaks.
Step 4: Adjusting the temperature
You can check the temperature of your hot water by opening a faucet and using a thermometer. To allow the water supply temperature to stabilize, let it flow for at least two minutes before checking the temperature.
If the water temperature needs to be adjusted:
- Unlock the temperature-adjusting cap screw on the thermostatic mixing valve with a hex wrench.
- Turn the screw counterclockwise to increase the temperature or clockwise to decrease the temperature.
- Tighten the screw and check the temperature again.
Good to know!
For safe use, check the manufacturer’s instructions for the recommended maximum and minimum heat settings for your mixing valve.
Congratulations, you’ve successfully installed or replaced a thermostatic mixing valve and assured your family of bacteria-free hot water throughout your house for many years to come. Time to relax in a hot bath and reflect on your handiwork.
National advertising powered by Mediative.com. Yellow PagesTM, Walking Fingers & DesignTM, YP.caTM, Find. & DesignTM, YellowPages.caTM, Canada411TM and YP ShopwiseTM are trademarks of Yellow Pages Digital & Media Solutions Limited in Canada. All other trademarks are the property of their respective owners. Copyright © 2018 Yellow Pages Digital & Media Solutions Limited. All Rights Reserved.


